I was busy scanning through various news feeds and came across a link to a post talking about how to use Azure Storage in a DotNetCore application. Curious as always at seeing how others do things I followed the link and was immediately hit with one of my pet peeves, there at the bottom of the screen was a "If you want to read the full article then sign up here..." message. So, to balance the scales I thought I'd put up my own post on working with Azure Storage in DotNetCore, if you want to read the full article then... read on and enjoy.
I decided to write this up on my home MacBook so that I can show that this works cross-platform as intended. So the code here all works on OSX and can be ported to Windows and Linux (I'm still delighted at being able to write cross-platform C# code).
First of all you'll need to create an Azure Storage account in your subscription. I'm not going to cover that here as there is plenty of help in Microsoft Docs to do this through the portal, Azure CLI and Powershell. What you will need to make a note of though is the name of the storage account and on of the access keys.
Getting started
Rather than writing everything inline in the code I wanted to use application configuration to get the storage account values. In the real world you're not going to be storing the values in your code (are you!) so it's worth getting use to working with external stores and config files are a good place to start.
To start with you'll need to create a new DotNetCore console application and install the pre-requisite packages.
$ mkdir dotnetblob
$ cd dotnotblob
$ dotnet new console
$ dotnet add package Microsoft.Extensions.Configuration
$ dotnet add package Microsoft.Extensions.Configuration.Json
$ dotnet add package WindowsAzure.Storage
Then, open up the code in your favourite editor. For anyone who's read anything by me before it shouldn't be a surprise that I'll be using Visual Studio Code. To open the editor using Code you can just do the following.
$ code .Simple right.
There's a couple of changes to make to the .csproj file first. We'll need to tell it that we want to use the latest language version (because I'm making use of an async main method), and that we want the appsettings.json file copied into the output directory. So add the following to the <PropertyGroup> section
<LangVersion>Latest</LangVersion>And add the following group just before the closing </Project> tag.
<ItemGroup>
    <None Include="appsettings.json" CopyToOutputDirectory="Always" />
</ItemGroup>
We can then create an appsettings.json file in the root of the working folder as follows, changing the values for the ones you noted down earlier when you created your storage account.
{
  "Storage": {
    "Name": "<Account name>",
    "Key": "<Account key>",
    "Container": "demo"
  }
}
This format allows us to structure our configuration so that all of the storage settings are in one place. The container name is set to demo for this, but really it can be changed to any valid container name you like.
Once we've done all of this we can write our C# code to start writing files to Azure Storage as Block Blobs. To do so we'll need to create some credentials, get a storage account object and then create a blob client, which looks a little like this.
var credentials = new StorageCredentials(_config["Storage:Name"], _config["Storage:Key"]);
var storageAccount = new CloudStorageAccount(credentials, useHttps: true);
var blobClient = storageAccount.CreateCloudBlobClient();
Simple again. The "useHttps: true" parameter value makes sure that we're enforcing an HTTPS connection, you can also do this from the storage account itself by revoking HTTP access. You can also see here how using the sections in the appsettings.json file helps to organise our application settings.
Now we'll need to get a reference to the container where we'll be putting files. As part of this demo we'll check to see if it exists and create it if it doesn't. This kind of lazy initialisation works well when you don't have any parts in your platform which require the container to exist before they'll work.
var container = blobClient.GetContainerReference(_config["Storage:Container"]);
if (!await container.ExistsAsync())
{
    await container.CreateAsync();
}
You don't have to use the Async methods, but it's good to get into the habit of doing so, especially if your using solutions like Azure Functions.
Finally we can get a blob reference and write some data into it, in this case I'm writing a simple text value but you can also use the same logic for copying files or other sources of data. As you'll see I'm also deleting the blob if it already exists, not something you might want to do, but useful for the purposes of the demo.
var blob = container.GetBlockBlobReference("demo_file.txt");
await blob.DeleteIfExistsAsync();

var demoText = "This is some sample text to go into our new blob";
using (var inputStream = new MemoryStream(Encoding.UTF8.GetBytes(demoText)))
{
    using (var blobOutputStream = await blob.OpenWriteAsync())
    {
        inputStream.CopyTo(blobOutputStream);
    }
}
And that's it, you can give your code a run with a simple "dotnet run" or step through in a debugger to see what's happening.
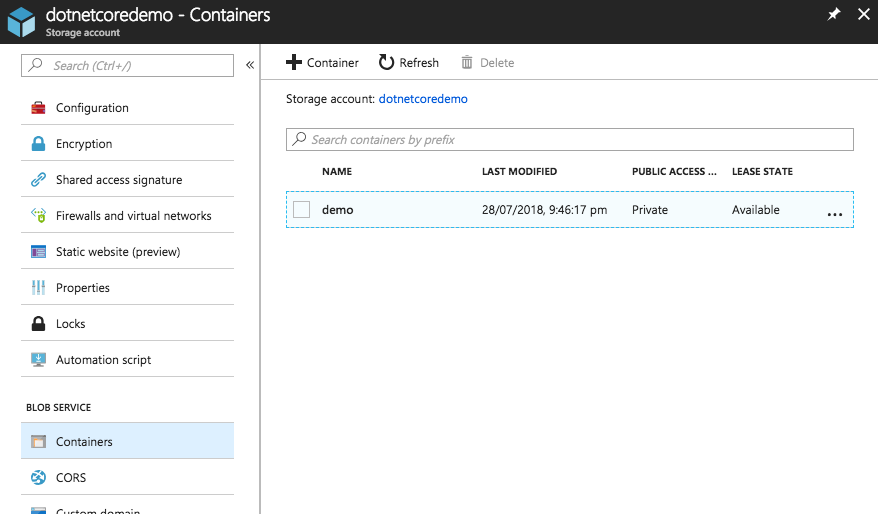
$ dotnet runIf you check your storage account you'll see that there's now a new container (assuming you didn't already create it) and a file in there with the text from the code.

If you don't want to write this all out yourself then the code is available over on GitHub, and whilst you're here why not have a look at some of our other great posts, not only for software engineering but also in the space of Data Science and other fun things that we're up to. Best of all, you don't have to sign up to read them, but you can always get in touch with us if you want to.
